安装文档地址:https://www.zabbix.com/documentation/3.0/
下载地址:http://repo.zabbix.com/zabbix/3.0/rhel/6/x86_64/
-->背景rpm安装
上次,从rpm安装到放弃http://blog.csdn.net/mchdba/article/details/51226751 ,事后仔细想了下,虽然rpm安装不成功,但是还有别的办法可以一试,比如resource,所以准备下载tar.gz准备源码安装。
对zabbix的安装做个大概的简介,zabbix安装需要安装以下4个重要的模块
(1)zabbix_server,zabbix服务器端,提供基础服务监控
(2)zabbix_agentd,zabbix客户端,为被监控的服务器与zabbix_server保持监控联系状态
(3)PHP,zabbix管理工程组件,zabbix-web是php工程
(4)nginx,通过nginx来控制访问zabbix-web工程界面
(5)MySQL,存储zabbix监控数据和基础信息PHP configuration for Zabbix frontend
1、关闭selinux
[root@hch_test_121_12 zabbix-server-mysql-3.0.1]# setenforce 0
setenforce: SELinux is disabled
[root@hch_test_121_12 zabbix-server-mysql-3.0.1]# getenforce
Disabled
[root@hch_test_121_12 zabbix-server-mysql-3.0.1]#
2、准备安装nginx
# 为了支持rewrite功能,我们需要安装pcre
yum install -y pcre*
# 需要ssl的支持,如果不需要ssl支持,请跳过这一步
yum install -y openssl*
# 安装nginx:
tar -xvf nginx-1.8.1.tar.gz
cd nginx-1.8.1
./configure --prefix=/usr/local/nginx-1.8.1 --with-http_ssl_module --with-http_spdy_module --with-http_stub_status_module --with-pcre

#--with-http_stub_status_module:支持nginx状态查询
#--with-http_ssl_module:支持https
#--with-http_spdy_module:支持google的spdy,想了解请百度spdy,这个必须有ssl的支持
#--with-pcre:为了支持rewrite重写功能,必须制定pcre

cd /usr/local/
ln -s nginx-1.8.1 nginx
/usr/local/nginx/sbin/nginx
3、安装php
Php5.6.20下载地址:
| http://php[.NET](http://lib.csdn.net/base/dotnet)/get/php-5.6.20.tar.gz/from/a/mirror |
|---|
开始源码安装php:
# 准备依赖的组件包
yum install gcc make gd-devel libjpeg-devel libpng-devel libxml2-devel bzip2-devel libcurl-devel -y
# 安装命令
tar -xvf php-5.6.20.tar.bz2
cd php-5.6.20
./configure   --prefix=/usr/local/php-5.6.20 --with-config-file-path=/usr/local/php-5.6.20/etc --with-bz2 --with-curl --enable-ftp --enable-sockets --disable-ipv6 --with-gd --with-jpeg-dir=/usr/local --with-png-dir=/usr/local --with-freetype-dir=/usr/local --enable-gd-native-ttf --with-iconv-dir=/usr/local --enable-mbstring --enable-calendar --with-gettext --with-libxml-dir=/usr/local --with-zlib --with-pdo-mysql=mysqlnd --with-mysqli=mysqlnd --with-mysql=mysqlnd --enable-dom --enable-xml --enable-fpm --with-libdir=lib64 --enable-bcmath
make
make install

cd /usr/local
ln -s php-5.6.20 php
cp /root/upload/php-5.6.20/php.ini-production /usr/local/php/etc/php.ini
cp /root/upload/php-5.6.20/sapi/fpm/php-fpm.conf /usr/local/php/etc/php-fpm.conf
ln -s /usr/local/php/sbin/* /usr/sbin/

# 启动php-fpm
php-fpm
[root@hch_test_121_12 local]# php-fpm
[root@hch_test_121_12 local]#

# check下是否启动成功
[root@hch_test_121_12 local]# netstat -ntpl|grep 9000
tcp        0      0 127.0.0.1:9000              0.0.0.0:*                   LISTEN      527/php-fpm
[root@hch_test_121_12 local]#
配置php.ini参数, vim /usr/local/php/etc/php.ini:
http://blog.csdn.net/mchdba/article/details/51263871
4、配置nginx
修改nginx配置文件/usr/local/nginx/conf/nginx.conf:
server {
         listen 80;
          server_name  ys.zabbix.com;
         access_log /usr/local/nginx/logs/zabbix.access.log;

         index index.php index.html index.html;
         root /usr/local/nginx/html/zabbix;

         location /
         {
                   try_files $uri $uri/ /index.php?$args;
         }

         location ~ .*\.(php)?$
         {
                   expires -1s;
                   try_files $uri =404;
                   fastcgi_split_path_info ^(.+\.php)(/.+)$;
                   include fastcgi_params;
                   fastcgi_param PATH_INFO $fastcgi_path_info;
                   fastcgi_index index.php;
                   fastcgi_param SCRIPT_FILENAME $document_root$fastcgi_script_name;
                   fastcgi_pass 127.0.0.1:9000;

         }
}
如果没有启用dns域名系统的话,可以在/etc/hosts加下ip地址和域名的配置:
# vim /etc/hosts
192.168.1.20 ys.zabbix.com
# 启动nginx服务
/usr/local/nginx/sbin/nginx
添加测试的info.php,在nginx的html目录:
mkdir -p /usr/local/nginx/html/zabbix
vim /usr/local/nginx/html/zabbix/info.php
# info.php录入以下内容
<?php
phpinfo();
?>
nginx将会连接回环地址9000端口执行PHP文件,需要使用tcp/ip协议,速度比较慢.建议大家换成使用socket方式连接。将fastcgi_pass127.0.0.1:9000;改成fastcgi_passunix:/var/run/phpfpm.sock;
检测php+nginx是否配置成功,在浏览器打开网址:ys.zabbix.com/info.php或者http://192.168.121.12/info.php,如下所示D:\study\zabbix\2.png:

5,开始安装zabbix
注明php要5.4以上,curl需要7.20以上,下载地址是:
tar zxvf zabbix-3.0.2.tar.gz
cd zabbix-3.0.2
./configure --prefix=/usr/local/zabbix --enable-server --enable-agent --with-mysql --enable-ipv6 --with-net-snmp --with-libcurl --with-libxml2
make
make install
6,准备mysql数据库
安装mysql数据库:
http://blog.csdn.net/mchdba/article/details/51138063
创建zabbix的数据库:
mysql> create database zabbix charset set utf8;
Query OK, 1 row affected (0.00 sec)

mysql> grant all privileges on zabbix.* to zabbix@'10.%' identified by 'zabbix0418';
Query OK, 0 rows affected (0.00 sec)

mysql> grant all privileges on zabbix.* to zabbix@'192.%' identified by 'zabbix0418';
Query OK, 0 rows affected (0.01 sec)

mysql>
PS:字符集要设置为utf8mb4,防止界面切换到中文的时候乱码。
7、开始配置zabbix数据库
编辑数据库配置文件,一般默认在/etc/zabbix/目录下:
# vim /etc/zabbix/zabbix_server.conf
DBHost=192.168.121.61
DBName=zabbix
DBUser=zabbix
DBPassword=zabbix0418
DBPort=3307
DBSocket=/usr/local/mysql/mysql.sock
8、启动zabbix
 启动:
/usr/local/zabbix/sbin/zabbix_server -c /etc/zabbix/zabbix_server.conf
查看后台进程:
[root@hch_test_121_12 zabbix-3.0.2]# ps -eaf|grep zabbix_server
zabbix   28130     1  0 17:46 ?        00:00:00 /usr/local/zabbix/sbin/zabbix_server -c /etc/zabbix/zabbix_server.conf
zabbix   28131 28130  0 17:46 ?        00:00:00 /usr/local/zabbix/sbin/zabbix_server: configuration syncer [waiting 60 sec for processes]
zabbix   28132 28130  0 17:46 ?        00:00:00 /usr/local/zabbix/sbin/zabbix_server: db watchdog [synced alerts config in 0.003818 sec, idle 60 sec]
zabbix   28133 28130  0 17:46 ?        00:00:00 /usr/local/zabbix/sbin/zabbix_server: poller #1 [got 0 values in 0.000006 sec, idle 5 sec]
zabbix   28134 28130  0 17:46 ?        00:00:00 /usr/local/zabbix/sbin/zabbix_server: poller #2 [got 0 values in 0.000005 sec, idle 5 sec]
zabbix   28135 28130  0 17:46 ?        00:00:00 /usr/local/zabbix/sbin/zabbix_server: poller #3 [got 0 values in 0.000005 sec, idle 5 sec]
9、Zabbix管理网站配置
先找zabbix的管理网站应用,默认是在源码解压缩下面的frontends/php/目录,然后copy到/usr/local/nginx/html/zabbix:
# 如果不记得源码安装目录,可以通过find / -name frontends全盘检索找到
unalias cp
cp  -r -f /soft/zabbix-3.0.2/frontends/php/* /usr/local/nginx/html/zabbix/
Apache configuration file for Zabbix frontend is located in /etc/httpd/conf.d/zabbix.conf. Some PHP settings are already configured. But it's necessary to uncomment the “date.timezone” setting andset the right timezonefor you.
php_value max_execution_time 300
php_value memory_limit 128M
php_value post_max_size 16M
php_value upload_max_filesize 2M
php_value max_input_time 300
php_value always_populate_raw_post_data -1
# php_value date.timezone Europe/Riga
SELinux configuration
Having SELinux status enabled in enforcing mode, you need to execute the following command to enable successful connection of Zabbix frontend to the server:
# setsebool -P httpd_can_connect_zabbix on
As frontend and SELinux configuration is done, you need to restart Apache web server:
# systemctl start httpd
Red Hat Enterprise Linux / CentOS
Installing packages
Here is an example for Zabbix server and web frontend installation with MySQL database:
# yum install zabbix-server-mysql zabbix-web-mysql
Creating initial database
Create Zabbix database and user on MySQL by the following commands, where <root_password> shall be replaced with the actual root password (e.g.,shell> mysql -uroot -p12345) and <password> with new password for zabbix user on the database (including apostrophes:…identified by '67890';):
shell> mysql -uroot -p<root_password>

mysql> create database zabbix character set utf8 collate utf8_bin;
mysql> grant all privileges on zabbix.* to zabbix@localhost identified by '<password>';
mysql> quit;
Now import initial schema and data. Make sure to insert correct version for3.2.*. You will be prompted to enter your newly created password.
# zcat /usr/share/doc/zabbix-server-mysql-3.2.*/create.sql.gz | mysql -uzabbix -p zabbix
In order to check the version you have in your package, use the following command:
# rpm -q zabbix-server-mysql
Database configuration for Zabbix server
Edit server host, name, user and password in zabbix_server.conf as follows, where DBPassword is the password you've set creating initial database:
# vi /etc/zabbix/zabbix_server.conf
DBHost=localhost
DBName=zabbix
DBUser=zabbix
DBPassword=<password>
Starting Zabbix server process
It's time to start Zabbix server process and make it start at system boot:
# systemctl start zabbix-server
# systemctl enable zabbix-server
报错:
SELinux is preventing /usr/sbin/zabbix_server_mysql from using the setrlimit access on a process.
此时如果关闭selinux,zabbix可以正常启动。
setenforce 0
1 configure: error: MySQL library not found
the problem is not installed mysql-devel
yum install mysql-devel
安装zabbix过程中
configure: error: Invalid Net-SNMP directory - unable to find net-snmp-config
通过
yum install net-snmp-devel
解决
问题:
nginx启动,导致图片和静态资源加载不过来
解决:6.启动zabbix server服务
修改配置文件:
[zabbix@miyan ~]$ vim /etc/zabbix/zabbix_server.conf
DBHost=localhost
DBName=zabbix
DBUser=zabbix
DBPassword=zabbix
实际上我的配置文件修改的是DBHost和DBPassword去掉前面的#号。
启动zabbix服务,设置开机自启动
[zabbix@miyan ~]$ sudo systemctl start zabbix-server
[zabbix@miyan ~]$ sudo systemctl enable zabbix-server
Created symlink from /etc/systemd/system/multi-user.target.wants/zabbix-server.service to /usr/lib/systemd/system/zabbix-server.service.
7.编辑zabbix前端的PHP配合配置
[zabbix@miyan ~]$ sudo vim /etc/httpd/conf.d/zabbix.conf
php_value max_execution_time 300

php_value memory_limit 128M
php_value post_max_size 16M
php_value upload_max_filesize 2M
php_value max_input_time 300

php_value always_populate_raw_post_data -1

php_value date.timezone Asia/Shanghai
实际上我就是修改了时区
启动apache服务,设置开机自启动
[zabbix@miyan ~]$ sudo systemctl start httpd
[zabbix@miyan ~]$ sudo systemctl enable httpd
Created symlink from /etc/systemd/system/multi-user.target.wants/httpd.service to /usr/lib/systemd/system/httpd.service.
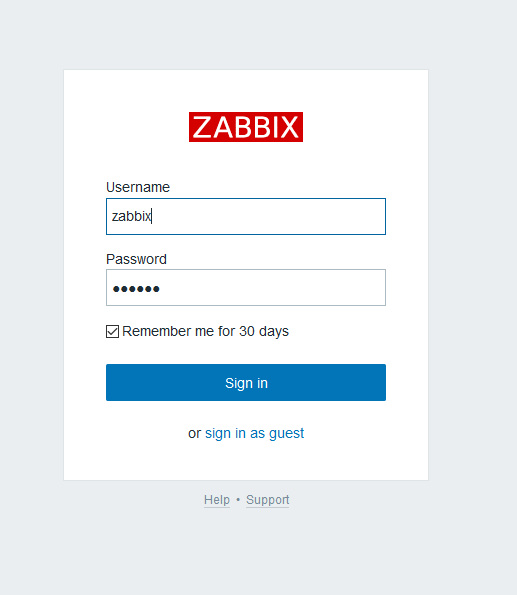
8.登陆zabbix
http://IP/zabbix/
显示的界面

http://www.cnblogs.com/XYJK1002/p/5324293.html
点击next会出现检查状态:

点击next配置mysql:
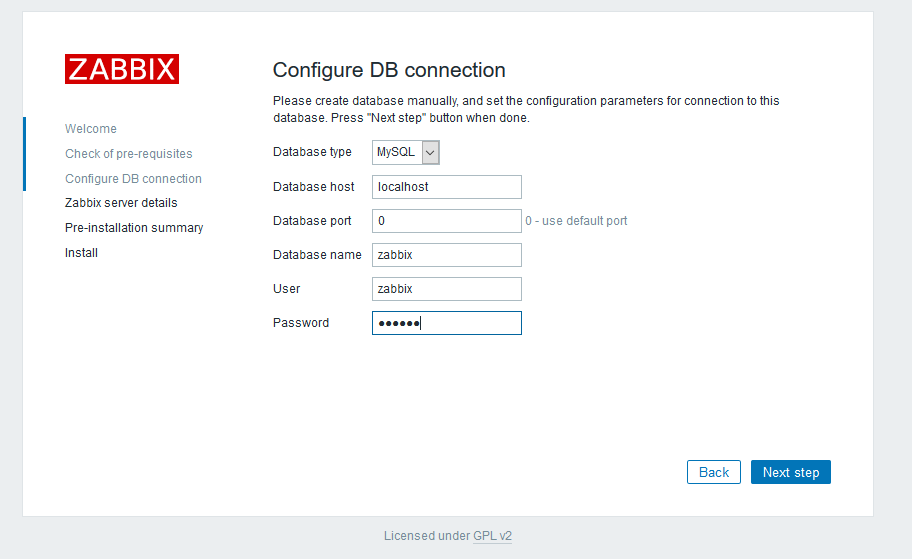
点击下一步。此步出现错误,发现无法连接数据库,最后发现zabbix这个数据库中,没有任何数据,检查时加红色的那部分出问题。
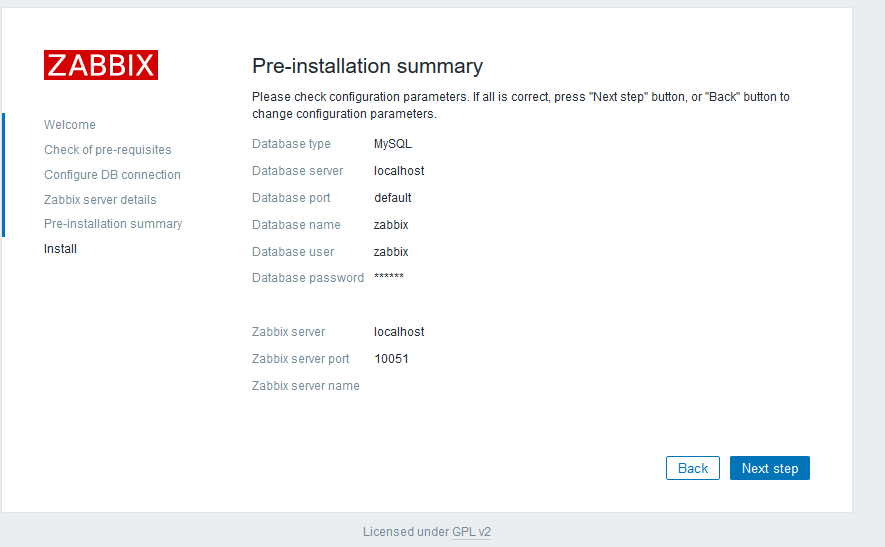
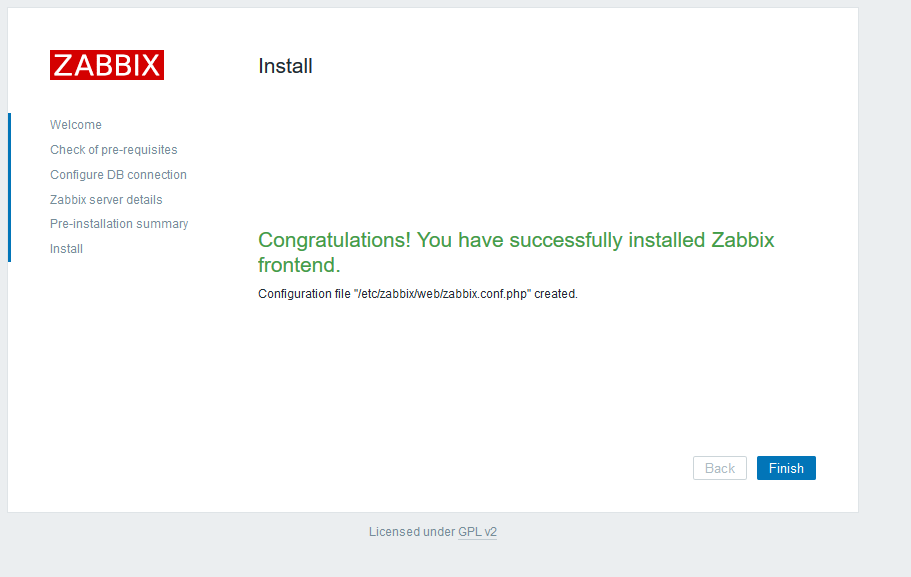
next到最后

默认用户名/密码:Admin/zabbix
点击zabbix右上角小人,进行修改:

还是遇到了中文乱码问题,直接google。

参考这位大神的。
http://www.cnblogs.com/enjoycode/p/zabbix_3_installation_on_centos_7.html
Win+R打开运行,输入fonts,回车进入Windows字体目录,找到微软雅黑-常规字体,复制出来将文件名修改为msyh.ttf,然后上传到/usr/share/zabbix/fonts
Zabbix3.2 客户端安装
# cat /etc/redhat-release
CentOS Linux release 7.2.1511 (Core)
# uname -r
3.10.0-327.28.2.el7.x86_64
Centos7 客户端:
地址:http://repo.zabbix.com/zabbix/3.2/rhel/7/x86_64/zabbix-agent-3.2.0-1.el7.x86_64.rpm

#rpm -ivh http://repo.zabbix.com/zabbix/3.2/rhel/7/x86_64/zabbix-agent-3.2.0-1.el7.x86_64.rpm
Centos6客户端:
http://repo.zabbix.com/zabbix/3.2/rhel/6/x86_64/zabbix-agent-3.2.0-1.el6.x86_64.rpm
Centos5客户端:
http://repo.zabbix.com/zabbix/3.2/rhel/5/x86_64/zabbix-agent-3.2.0-1.el5.x86_64.rpm
网页下载:
http://www.zabbix.com/download.php
配置:
#yum clean all
#yum -y install zabbix zabbix-agent
配置:
vim /etc/zabbix/zabbix_agentd.conf
Server=192.168.0.50
ServerActive=192.168.0.50

配置完以上之后就是添加监控主机了
检测:
ps -ef | grep zabbix
netstat -n | grep 10050   (默认使用 100050 端口)
启动并开机: #systemctl start zabbix-agent #systemctl enable zabbix-agent